Kitty Granny Squares: Free Easy Crochet Pattern Guide
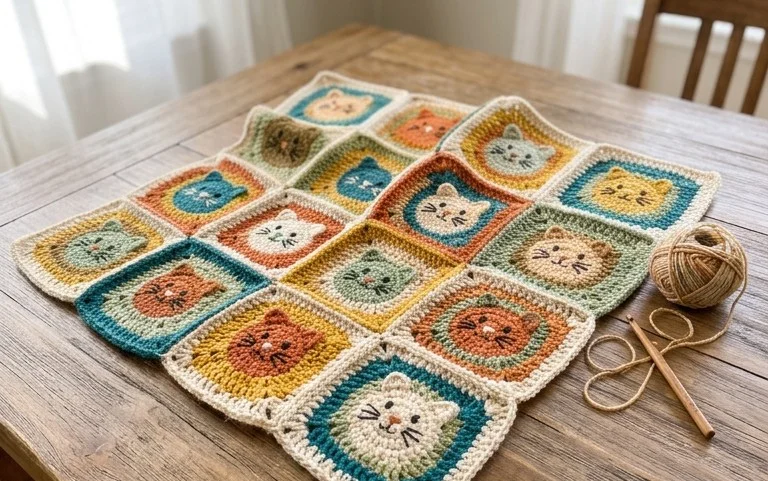
These feline-inspired squares turn simple yarn scraps into charming motifs that sit comfortably in the palm of your hand. The finished pieces feature soft rounded ears and a tactile surface that brings a playful touch to handmade blankets or nursery cushions. Beginners find this project particularly satisfying because it transforms standard stitches into recognizable shapes through simple color changes and basic counting. You will learn how to transition between yarn colors effectively and shape corners to create a distinct cat silhouette. This project suits anyone who wants to practice core techniques while ending up with a collection of adorable handmade squares ready for assembly.
Why You’ll Love This Pattern
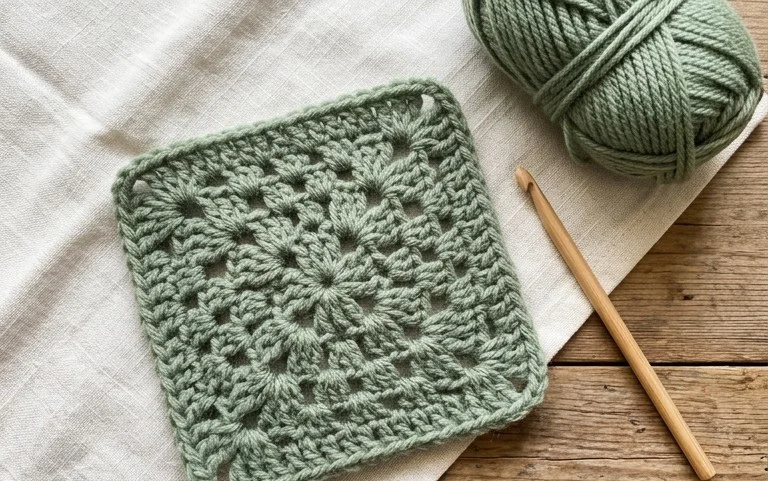
The Classic Crochet Granny Square is the quintessential building block for fiber artists because it relies on a repetitive, rhythmic stitch pattern that quickly becomes muscle memory. This specific design uses a traditional three-double-crochet cluster technique, making it ideal for utilizing leftover yarn ends from larger projects. Because each square works up in mere minutes, you can easily create a stash of motifs to join into blankets, tote bags, or decorative pillows at your own pace. The open structure of the stitches allows the finished piece to drape beautifully while maintaining a sturdy, reliable shape.
I finally learned to read a pattern with this square and the instructions are so clear that I made an entire throw blanket in just two weeks.
— Sarah, hobbyist crafter
Pattern Overview & Skill Level
- Skill Level: Beginner
- Approximate Time: 20 to 30 minutes per square
- Construction: Working in rounds from the center outward
- Finished Dimensions: Approximately 5 inches by 5 inches using medium weight yarn
Materials & Supplies Needed
- Yarn: Worsted weight (#4) acrylic or wool blend, approximately 15 yards per square.
- Hook Size: 5.0 mm (US H-8).
- Notions: Tapestry needle for weaving in ends, scissors, and optional locking stitch markers to track the corners.
- Safe Yarn Substitutions: Cotton yarn works well for dishcloths but will result in a smaller, stiffer square; bulky yarn creates a much larger, plush square but requires a larger hook size (6.0 mm or 6.5 mm).
Stitch Guide & Abbreviations (US Terms)
- ch = chain
- dc = double crochet
- sl st = slip stitch
- sp = space
- cluster = a group of 3 dc stitches worked into the same chain space
- MR = magic ring (or ch 4 and sl st to the first chain to form a ring)
Step-by-Step Pattern Instructions
Square Body
- Rnd 1: Start with a MR. Ch 3 (counts as first dc), work 2 dc into ring, ch 2, *3 dc into ring, ch 2; repeat from * two more times. Sl st to the top of the beginning ch 3 to join. (12 dc, 4 ch-2 sps)
- Rnd 2: Sl st into the next two sts and into the first ch-2 sp. Ch 3, 2 dc in same sp, ch 2, 3 dc in same sp (corner made). *Ch 1, skip 3 sts, (3 dc, ch 2, 3 dc) in next ch-2 sp. Repeat from * twice more. Ch 1, sl st to top of beginning ch 3. (24 dc, 4 ch-2 sps, 4 ch-1 sps)
- Rnd 3: Sl st into next two sts and into the ch-2 sp. Ch 3, 2 dc in same sp, ch 2, 3 dc in same sp. *Ch 1, 3 dc in next ch-1 sp, ch 1, (3 dc, ch 2, 3 dc) in next ch-2 sp. Repeat from * twice more. Ch 1, 3 dc in next ch-1 sp, ch 1, sl st to join. (36 dc, 4 ch-2 sps, 8 ch-1 sps)
- Rnd 4: Sl st into next two sts and into the ch-2 sp. Ch 3, 2 dc, ch 2, 3 dc in same sp. *Ch 1, 3 dc in next ch-1 sp, ch 1, 3 dc in next ch-1 sp, ch 1, (3 dc, ch 2, 3 dc) in next corner. Repeat from * around. End with ch 1, sl st to join. (48 dc, 4 ch-2 sps, 12 ch-1 sps)
Finishing
Fasten off your yarn, leaving a six-inch tail. Pull the tail through the final loop to secure the knot. Use your tapestry needle to weave the yarn tail through the back of the stitches to hide it securely. Ensure you do not pull too tightly, or the square will begin to pucker or lose its flat shape.
Care & Washing Instructions
- Machine wash your finished items on a gentle cycle in cool water (max 30C/86F).
- Lay the item flat on a towel to air dry, avoiding direct sunlight to prevent fiber degradation.
- Gently reshape the square while damp by pinning the corners to a blocking board to ensure perfectly square edges.
Pro Tips & Common Mistakes to Avoid
Maintaining consistent tension is vital for a flat square. If your work begins to cup or bowl, your tension is too tight; if it ripples or ruffles, your tension is too loose. Always place a stitch marker in the beginning chain-3 of every round to easily identify where to join your slip stitch. When weaving in your ends, ensure you run the needle in multiple directions through the stitches to prevent the tail from poking out over time. If you wish to adjust the size, simply add more rounds following the pattern established in Round 4, placing 3 dc in every side chain-space and increasing at the corners.
Frequently Asked Questions
Can I use a different yarn weight for this pattern?
Yes, you can use any yarn weight, but you must adjust your hook size to match the yarn manufacturer’s recommendation. Using a lighter weight yarn will result in a smaller square, while a heavier yarn will produce a larger one.
Why is my square not laying flat?
If your square is wavy, you are likely working too many stitches per side. If it is curling or pulling inward, your stitches are likely too tight, or you are missing stitches in the side gaps.
Is it okay to sell items made from this pattern?
You are welcome to sell finished items created from this pattern. We appreciate it if you credit the design back to this tutorial, though it is not required by law.
How do I join these squares together?
The most common methods include using a mattress stitch for an invisible seam or a single crochet join for a decorative, raised ridge effect. Both options provide a durable connection for blankets.
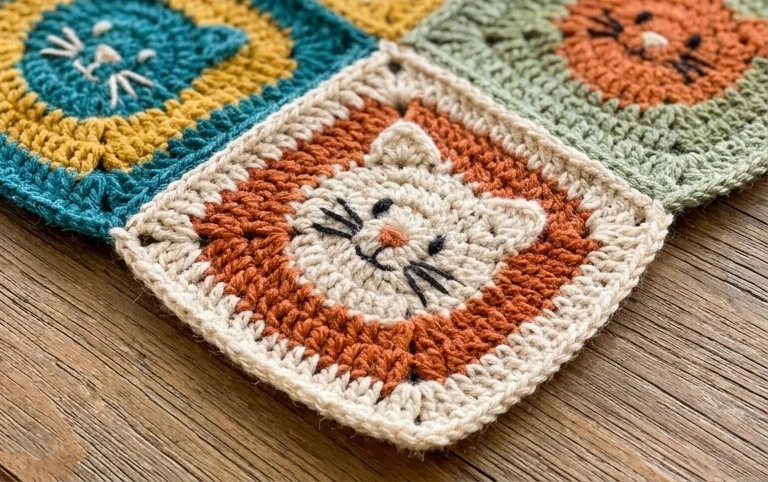
Creating a pile of these feline motifs brings a unique personality to any handmade blanket or wall hanging. You can try using a fuzzy mohair blend for the ears to give your finished squares a softer texture that really mimics real cat fur. Sharing your progress or photos of your completed projects online helps others find inspiration for their own yarn stash. Feel free to browse through the rest of the site for more free crochet patterns that help you build your crafting skills one stitch at a time.