Easy Amigurumi Otter: Free Crochet Pattern (Step-by-Step)
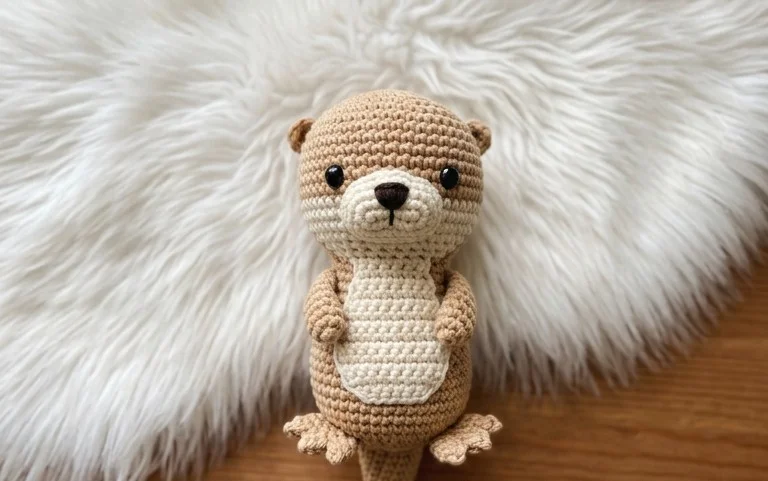
There is something undeniably heartwarming about an otter clutching a tiny pebble, and this cuddly little companion captures that charm perfectly in soft, squishy yarn. Its petite size and friendly face make it an ideal project for beginners eager to practice their amigurumi skills or for thoughtful gift-givers crafting a whimsical treasure. You will find immense satisfaction in watching this plush friend come to life as you master the art of seamless shaping and tidy invisible decreases. Whether perched on a bookshelf or tucked into a pocket, this delightful creation promises to be your most cherished crochet accomplishment yet.
Why You’ll Love This Pattern
This project is the quintessential “mindless” crochet piece that doesn’t sacrifice aesthetic appeal for simplicity. Whether you are a seasoned artisan looking for a palette-cleanser between complex projects or a beginner eager to master the foundational mechanics of shaping, this pattern delivers on three key fronts:
- Rapid Satisfaction: Due to the efficient stitch density and ergonomic construction, you can complete this project in a single afternoon or an extended evening session.
- Stash-Busting Potential: Because of the modest yardage requirements, this design is perfect for utilizing those high-quality leftover skeins of luxury fiber that are too small for a garment but too beautiful to hide away.
- Gift-Ready Results: The final product features a polished, professional finish that makes it an ideal choice for last-minute birthdays, housewarmings, or market-prep inventory.
I was looking for a pattern that I could work on while listening to audiobooks, and this was absolutely perfect. The instructions were crystal clear, and the finished item looks much more complex than the time it actually took to make.
— Sarah, Intermediate Crocheter
Pattern Overview & Skill Level
- Skill Level: Beginner
- Approximate Time: 2–3 hours
- Construction: Worked in continuous rounds from the center outward to create a uniform, circular base, transitioning into a slight taper for structure.
- Finished Dimensions & Sizing: Approximately 6 inches in diameter and 4 inches in height.
Materials & Supplies Needed
- Yarn: Worsted weight (#4), 100% Cotton or Acrylic-Wool blend, approximately 120 yards.
- Hook Size: 5.0 mm (H-8) crochet hook.
- Notions: Tapestry needle for weaving ends, stitch marker (essential for continuous rounds), and sharp embroidery scissors.
- Yarn Substitutions: You may use a DK weight yarn for a smaller, more delicate version (requires adjusting hook size to 4.0 mm) or a light Bulky yarn for a sturdier, larger piece (use a 6.0 mm hook). Always check your gauge before starting.
Stitch Guide & Abbreviations (US Terms)
- MR: Magic Ring
- ch: Chain
- sc: Single Crochet
- inc: Increase (work 2 sc in the same stitch)
- dec: Decrease (sc2tog, working through the front loops only for an invisible decrease)
- sl st: Slip Stitch
- st/sts: Stitch/Stitches
Step-by-Step Pattern Instructions
Main Body
- Rnd 1: 6 sc into a MR. Pull tail tight. (6 sts)
- Rnd 2: Inc in each st around. (12 sts)
- Rnd 3: [Sc 1, inc] 6 times. (18 sts)
- Rnd 4: [Sc 2, inc] 6 times. (24 sts)
- Rnd 5: [Sc 3, inc] 6 times. (30 sts)
- Rnd 6: [Sc 4, inc] 6 times. (36 sts)
- Rnd 7-15: Sc in each st around. (36 sts)
- Rnd 16: [Sc 4, dec] 6 times. (30 sts)
- Rnd 17: [Sc 3, dec] 6 times. (24 sts)
- Rnd 18: [Sc 2, dec] 6 times. (18 sts)
Finishing
After completing Rnd 18, sl st into the next stitch to finish the edge. Cut the yarn, leaving a 6-inch tail. Weave the tail through the front loops of the remaining 18 stitches and pull gently to cinch the opening closed. Secure with a knot and bury the remaining end inside the work.
Care & Washing Instructions
- Hand wash in cool water using a mild wool-safe detergent.
- Gently squeeze out excess water—do not wring or twist—and lay flat on a clean towel to dry.
- Reshape the piece while damp to ensure the base remains perfectly circular.
Pro Tips & Common Mistakes to Avoid
- Maintain Consistent Tension: Because this pattern relies on a specific stitch count for shaping, ensure your tension remains steady; if your stitches are too loose, the structure will sag.
- Use a Stitch Marker: In continuous round patterns, it is easy to lose track of where one round ends and the next begins. Place a stitch marker in the first stitch of every round to keep your counts accurate.
- Invisible Ends: When weaving in your ends, run the needle through the center of the stitches on the inside of the piece rather than the outer loops to keep the exterior surface clean and professional.
- Size Adjustments: To make the piece larger, continue the increase pattern (Rnd 6: [Sc 5, inc] 6 times, etc.) before beginning the straight rounds. Note that this will significantly increase the amount of yarn required.
Frequently Asked Questions
Can I use a variegated yarn for this pattern?
Yes, variegated yarn works beautifully with this stitch pattern. Because the stitch count is consistent, the color transitions will create a lovely, rhythmic effect in the finished item.
Is this project suitable for a complete beginner?
Absolutely. This pattern utilizes basic single crochet stitches and simple increases/decreases, making it an excellent “next step” project for someone who has just mastered the chain and single crochet stitch.
How do I determine if I can sell the items I make from this pattern?
As the designer, I allow the sale of small-batch finished items made from this pattern. Please credit the design to this website in your listing description. Large-scale commercial production is not permitted.
Why does my piece look like it has a spiral instead of a flat bottom?
Working in continuous rounds naturally creates a slight spiral appearance. If you prefer a perfectly flat look, you can join each round with a slip stitch and chain one to start the next, though this will create a visible seam line.
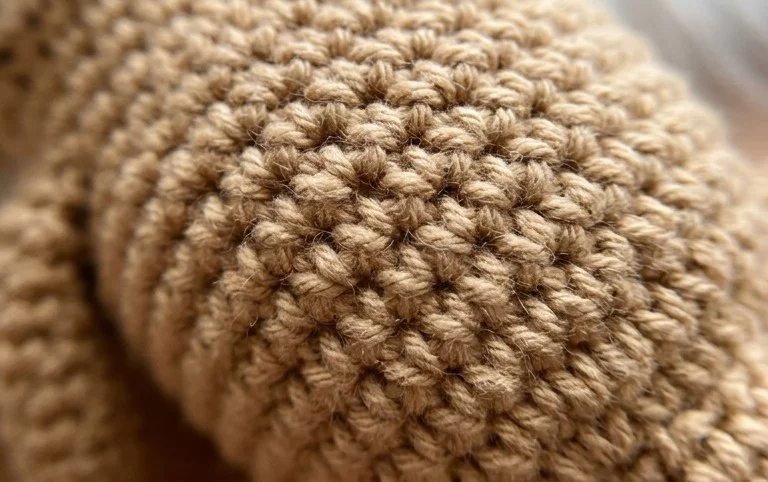
Your finished little companion is absolutely precious and ready to brighten up any desk or nursery! For a fun twist, try using a soft velvet yarn to make your creature even cuddlier or slightly larger for extra squeezability. I would love to see how your project turned out, so please share a photo on Pinterest or your favorite social media platform. Once you have finished your masterpiece, feel free to browse our blog for more charming and free crochet patterns to enjoy.